
Vendor Registration
Setu Store Vendor Registration Process
Follow these simple steps to become a vendor on our marketplace and start selling to millions of customers.
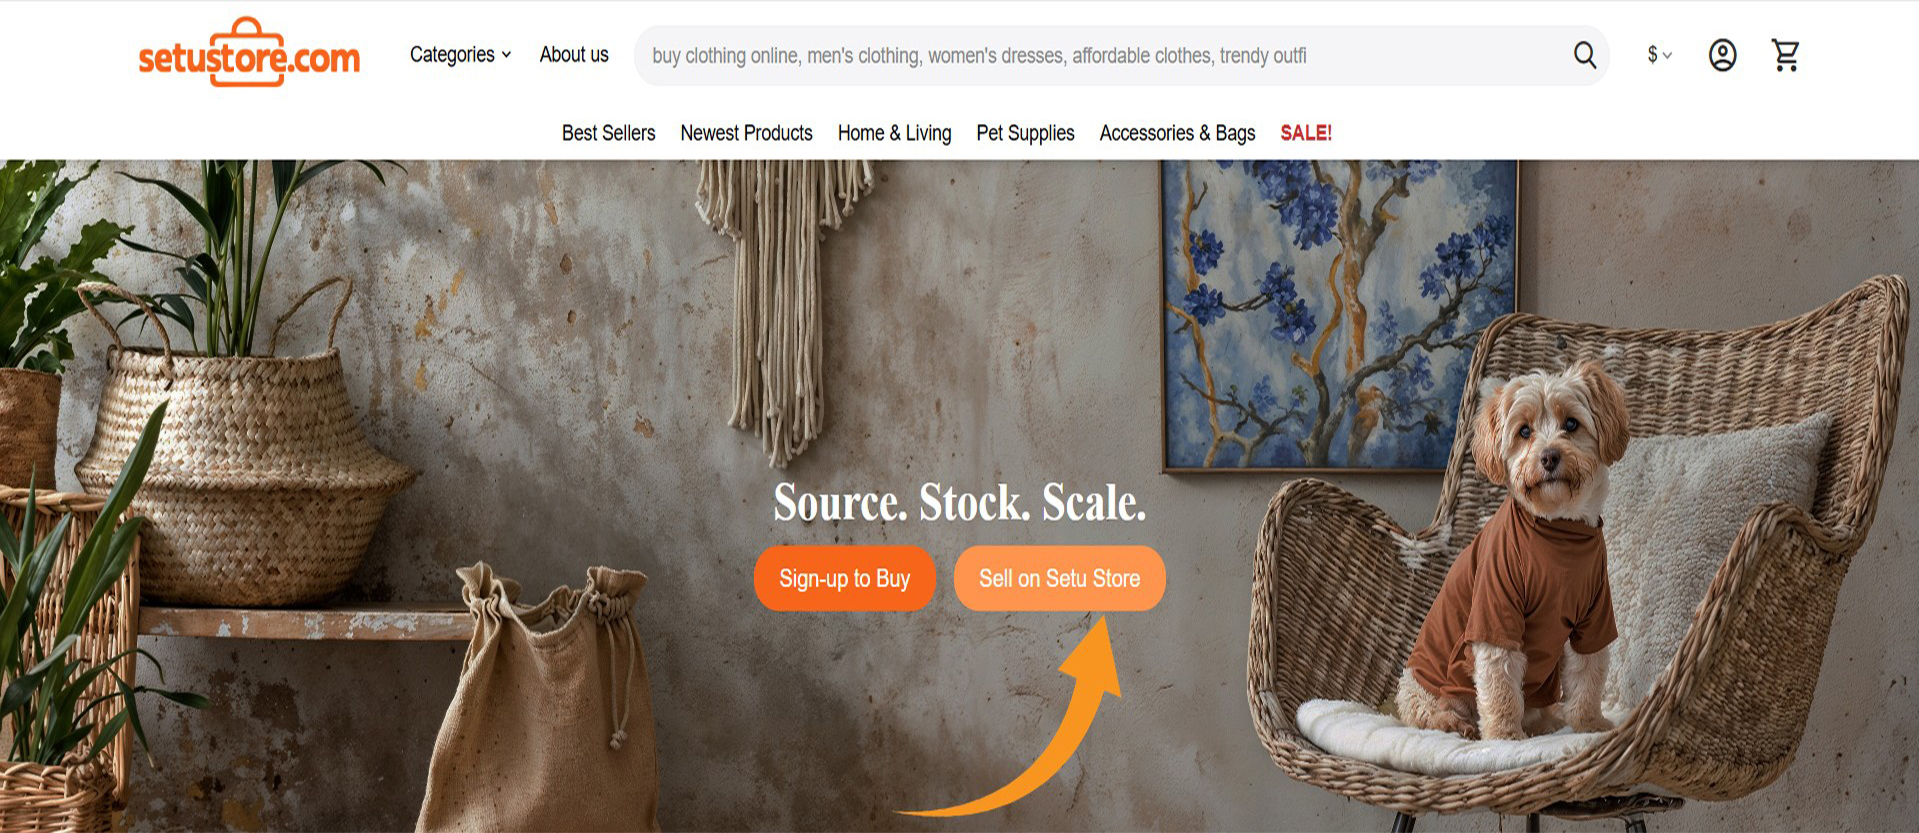
1. Visit Setu Store Website
Go to setustore.com in your web browser and click on Sell on Setu Store at the top banner.
Tip: Make sure you're using the latest version of Chrome, Firefox, or Edge for the best experience.
Required Information
- ✓ Company Name
- ✓ GSTIN
- ✓ Company PAN Card
- ✓ Bank Details
- ✓ Business Address
- ✓ Phone Number
2. Fill Vendor Details
Complete the vendor registration form with accurate information about your business:
- Company Name: Your registered business name as it appears on official documents.
- Company Type: Specify your business structure (e.g., Sole Proprietorship, Partnership, LLP, Pvt. Ltd.).
- GSTIN: 15-digit Goods and Services Tax Identification Number.
- Bank Details: Bank account name, account number, branch address, and IFSC code.
- Contact Information: Primary contact details including email and phone.
- Business Address: Complete physical address of your business operations.
Important: All information should match your business registration documents for faster approval.
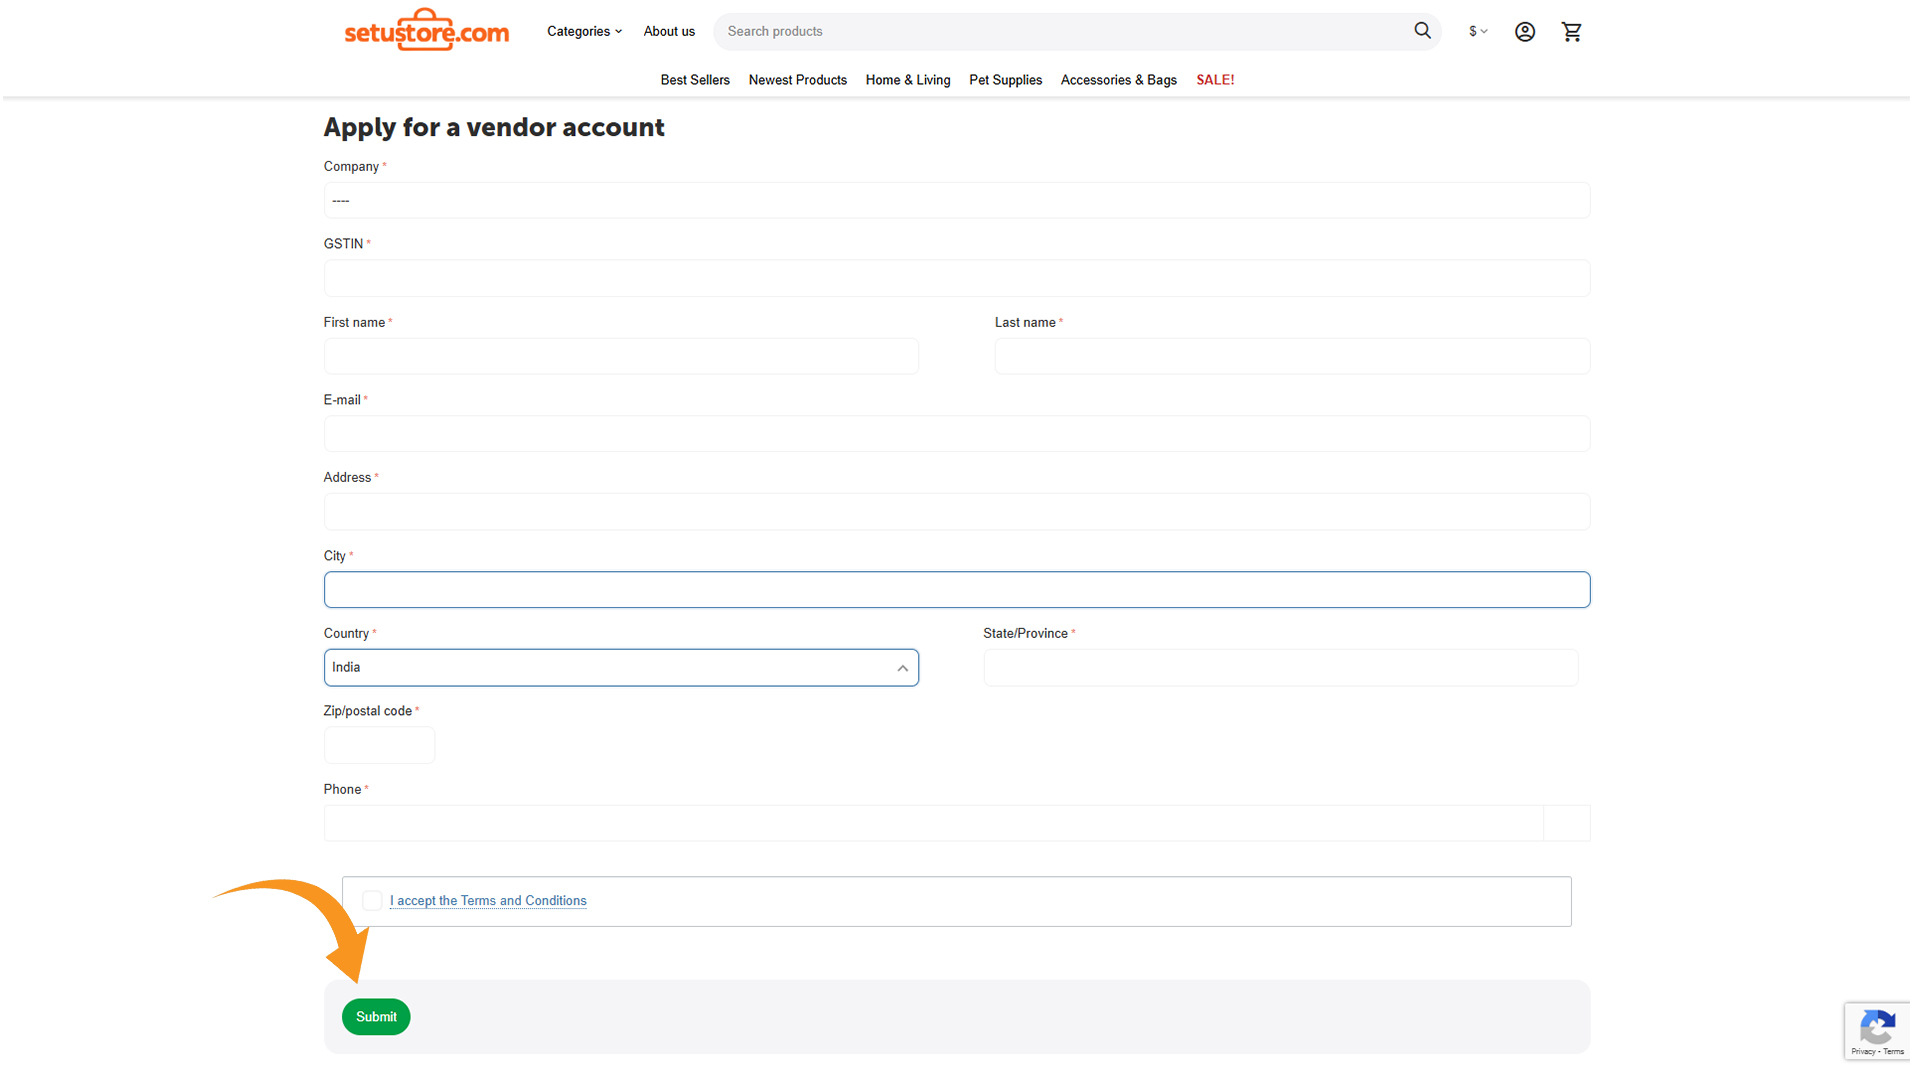
3. Submit Your Application
After carefully reviewing all the information you've provided:
- Check all fields for accuracy
- Agree to the Terms and Conditions
- Click the "Submit" button
You'll receive an email confirmation that we've received your application.
Approval Timeline
4. Await Vendor Approval
Your vendor account will now undergo our approval process:
- Initial Review: Our team verifies your business information
- Document Check: We may request additional documents for verification
- Final Approval: Complete review by our vendor management team
You'll receive email notifications at each stage of the review process.
Login Details: After approval of your vendor account you will be receiving an email with login credentials
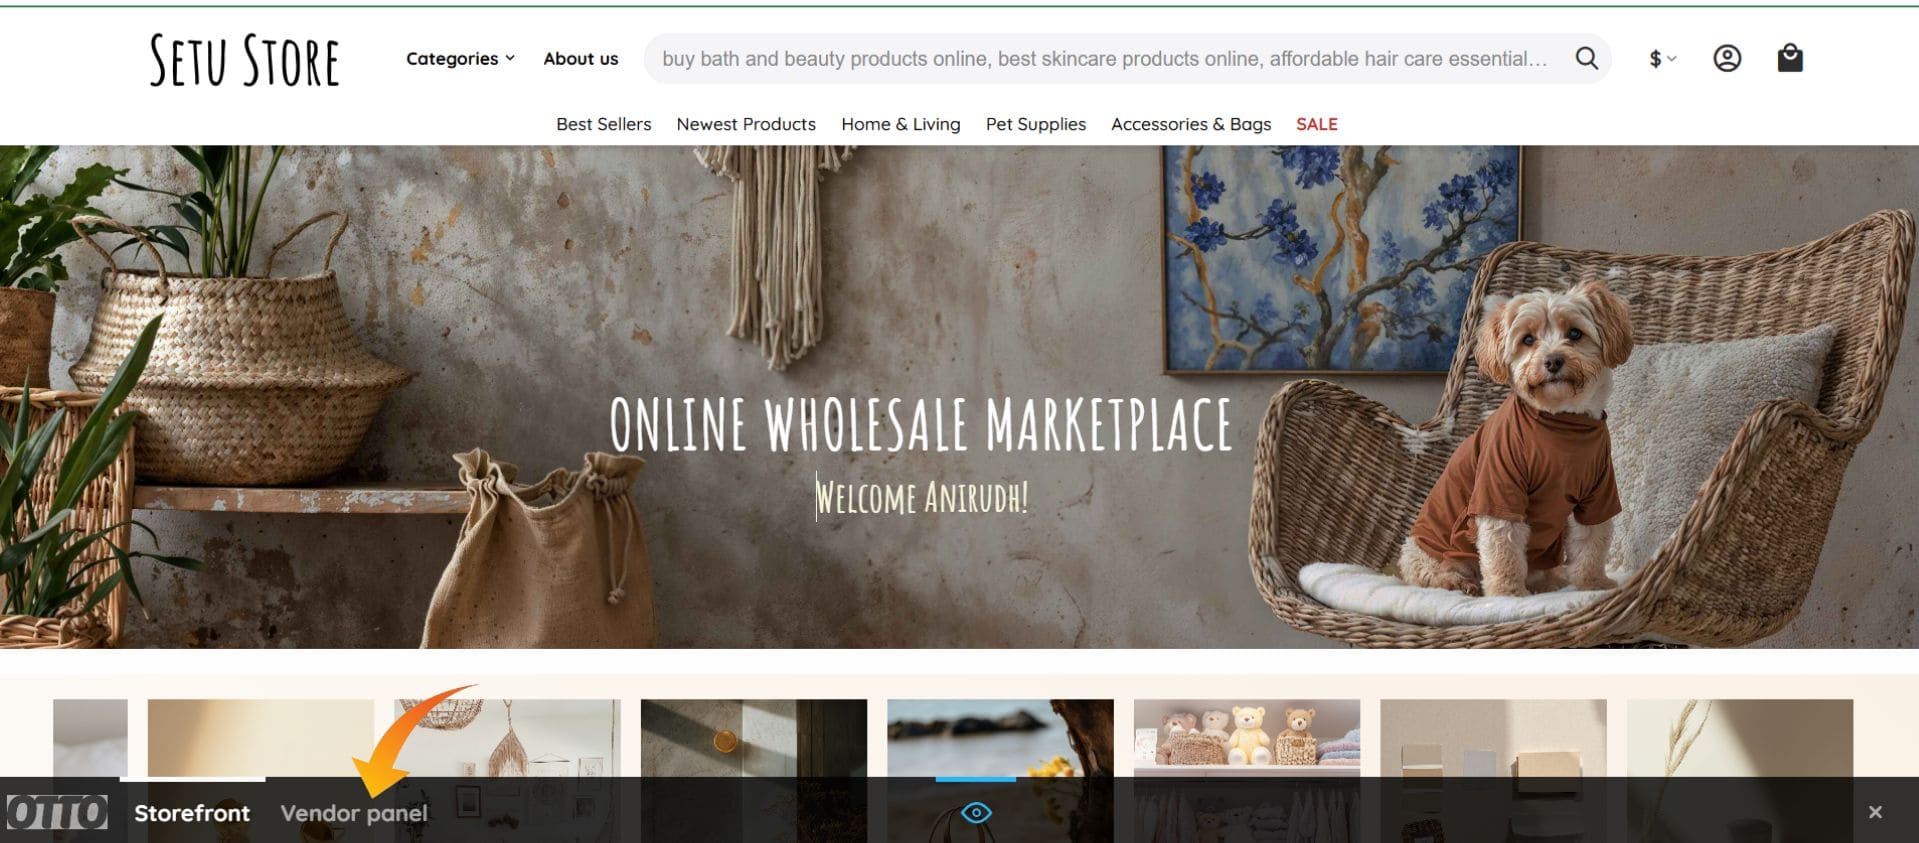
5. Access Your Vendor Admin Panel
Once approved, you'll receive an email with your login credentials containing:
- Your vendor account username/email
- A password (you can change it via clicking on your profile page.)
- Link to the vendor admin panel
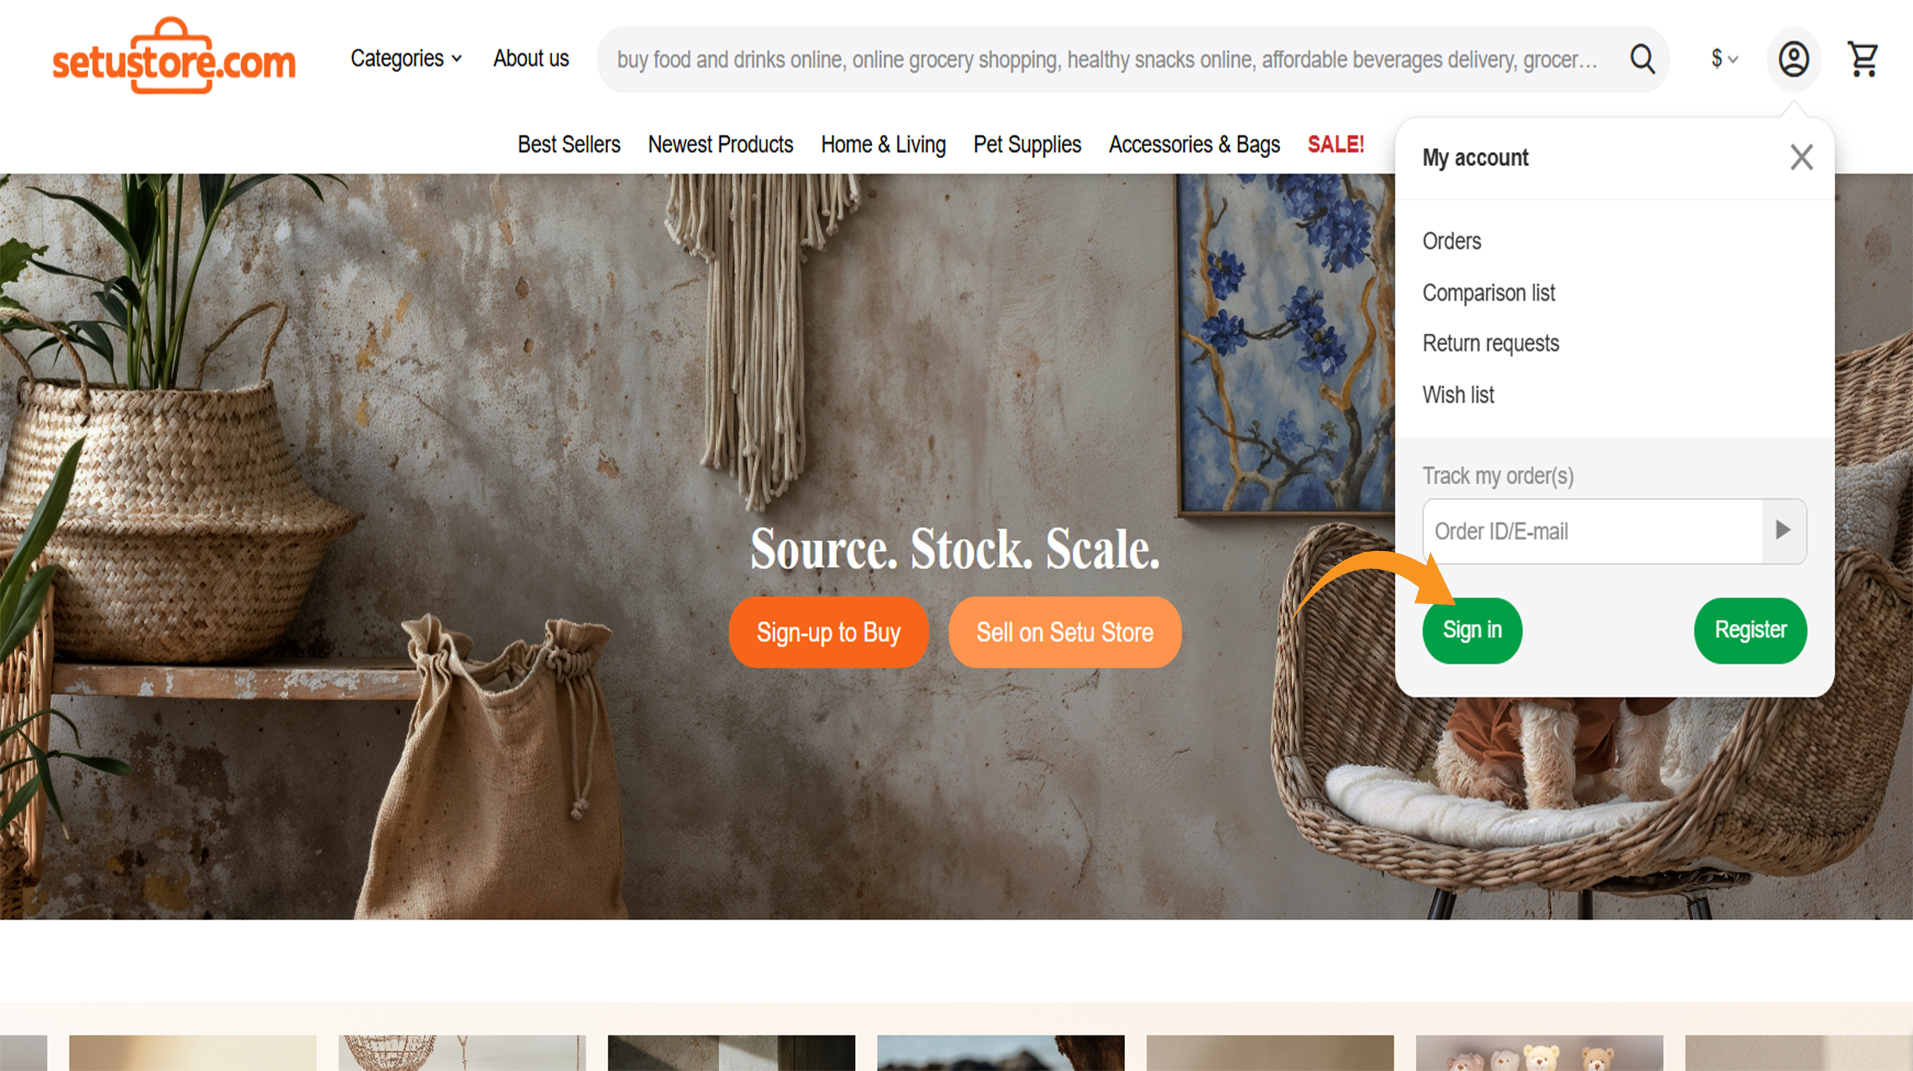
To access your vendor admin panel:
- Go to setustore.com
- Click "Profile Button" in the top right corner
- Click on "sign in"
- Enter your credentials
Welcome, Now you can setup your vendor profile
6. Setting up Vendor Profile
You can reset you profile password and add your custom logo to your vendor profile.
- After you login, you will be landed to your profile page where you can edit your password
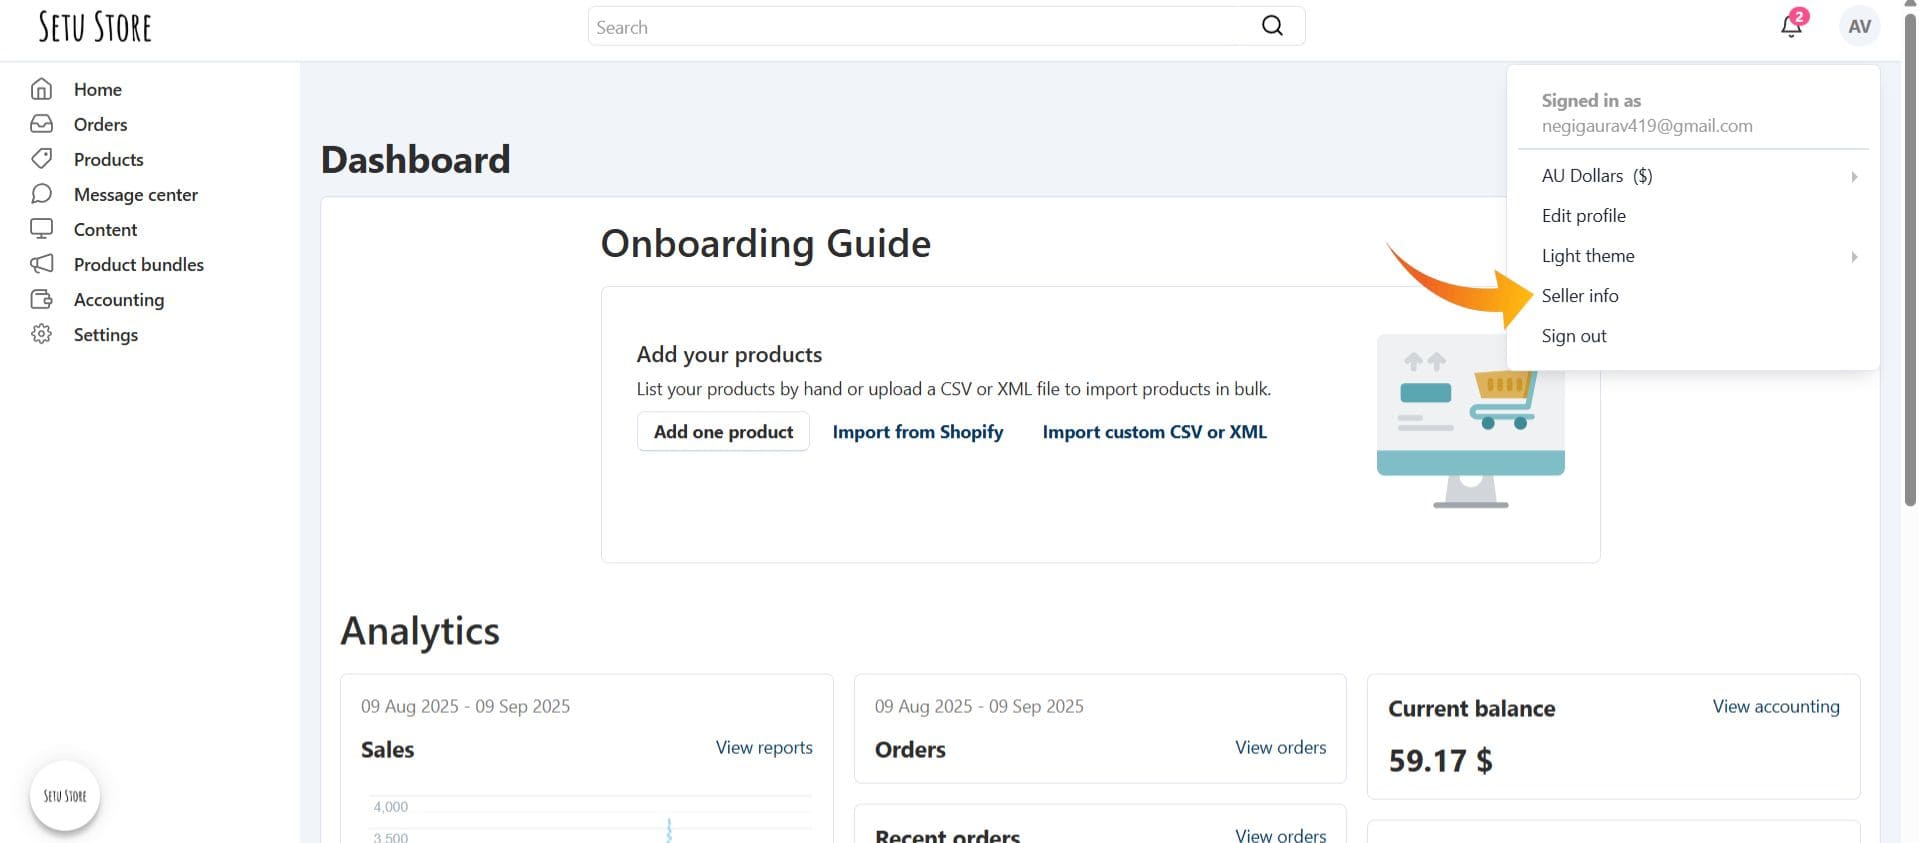
- Next, click on your profile at top-right corner and click on the seller-info option and fill general details.
- Now, Click on addons and write your vendor name in SEO.
- Write about your business, products in the Description tab.
- On, the logo tab there there are two options, one for the customer which will be visible in the website storefront and second for the invoice. Upload your logo in both the options.
- Click on Save.

Welcome aboard! Once logged in, setup your profile and start adding products to your catalog.
Vendor Support
Have questions about the registration process? Our team is here to help.
- Email: harsh@setustore.com
- Phone: +91 7838797366 (Mon-Sun, 9AM-6PM)
- Message Center: Available on the Setu Store website Vendor Panel